Showing posts with label sew. Show all posts

Thursday, February 22, 2007

My First Quilt Project


I have officially started making my first quilt!! I've wanted to learn how to quilt basically since I started sewing a couple of years ago, but was waiting until I was "ready." I was recently inspired by the new line of Freschcut Fabric by Heather Bailey. She has a great blog called Hello My Name is Heather, which I started reading last summer. She has wonderful taste, cute projects, and takes truly beautiful photographs.

So when I heard that she was coming out with her own line of fabric, I was excited! Her fabrics came out earlier this year through the Free Spirit Fabric company. I was browsing through the Fat Quarter Shop, and found this: a "Jolly Pack" of all 40 of her fabrics in 5 inch squares! The stars had aligned--this is how I would make my first quilt! This idea was very appealing to me, in that I didn't have to worry about choosing colors or cutting fabric. All 40 of the fabrics go together very well without being too matchy, and they are pre-cut with pinking shears.

Last weekend, I went to my mom's house, and she helped me come up with a design for the squares. I needed some solid colors to integrate into all of the patterns, so she gave me some yellow and green fabric squares to sprinkle in there. I know it's difficult to see in the pictures, but the yellow fabrics has light, faded polka dots on it, and the green fabric has tiny moons and stars on it. Perfect!

The design we came up with features this fabric, my favorite of all of the prints:

This is actually my mom's favorite too! (Click here for a bigger picture) We placed four squares of this fabric in each of the shades in the center, and surrounded it with a green and yellow border. Then we put four green squares in each outside corner, evenly distributed some yellow squares and the rest of the printed fabrics. Mom gave me a quick lesson and showed me how to iron and pin the squares so that they line up correctly. Arranging the squares and cutting the yellow and green fabric squares took most of the afternoon, so we stopped before any actual sewing.


The next morning, armed with coffee and lots of excitement, I started piecing the strips together. I sewed one row together, and then sewed two strips together (eight strips total). It was so fun! After each strip was added, I ran upstairs to show Mike, who was deep in computer-playing mode. He was a good cheerleader though!

My next step is to add a 6-inch border around the edges, which will make it about 52" square (lap blanket size). I was thinking about edging it in the yellow fabric, and then backing the whole quilt with green fabric. I also like all of the pinks in the fabrics--I could back it with pink. What do you think?

Then, I'll be off for a trip to my Granny's house, where she can help get me started on the actual quilting part! I plan to quilt it by hand for this first one--wish me luck!

Thursday, January 18, 2007

Behold my new Sewing Cabinet!


My mom gave me this beautiful new sewing cabinet for Christmas--definitely my favorite gift this holiday season! It is a Koala Sew Mate II, and an absolute dream come true.


Up until this past Christmas, I did my sewing where most young people living in apartments with no extra space do--on the dining room table. And I use dining room loosely, as our dining room/living room is just one long space. It's not so easy to sew when you are trying not to knock over pepper grinders and cups of coffee. I found it hard to get into a groove when I kept having to hunt for scissors, bobbins, and other paraphernalia when there is no designated place to set them down.

I have been wanting a sewing cabinet for quite a while, but couldn't find what I wanted out there. All of the ones I found were either white or light oak in color--too "country" for me. I wanted something a little more modern. I had complained ab
out it to my mom, and she hatched a plan to find me one for Christmas. She enlisted Mike's help, getting him to measure spaces, and figure out what I needed. Whenever I brought up my desperate need for a sewing cabinet, and how we should go look for one immediately, Mike sneakily would say, "Why don't we look after Christmas when most furniture places have big sales?" So, I huffed and puffed, but eventually agreed.

Then, lo and behold, I received this beautiful cabinet for Christmas! And it is everything a girl could want! It fits perfectly into this goofy little corner we have in our living room, which I like to call a nook. It used to have a swivel chair in it, but nobody really sat there because it is too far removed from the couch and conversation. The cabinet feels just right there, and gives me a special, designated spot for crafting.

Oh, and the features! I know it's hard to see in the pictures, but it has a pull out cabinet with two drawers and a shelf on the left hand side. One of the drawers has a built-in notions organizer--my life is complete! The other door of the cabinet reveals the spot for the sewing machine, which raises and lowers, as well as more built-in storage on the door. It also has a fold-out table leaf on the back, which doubles the surface area again.

My first time to sew using the cabinet was a dream. I had a spot for everything, and had plenty of surface area to work on. I repurposed my dining room table for a cutting table (still don't have room for one of those). I made a checkbook cover and two out of a set of four place mats. I will post pictures of those soon.

To further cement my craft corner, I want to make some wall hangings for the empty space above my desk. Like the ones made by Sally here. And here. Aren't they cute?

The possibilities are endless with my new sewing cabinet!!


Tuesday, January 16, 2007

Last of my handmade Christmas gifts!

Here are the twenty journal covers that I made for my friends for Christmas gifts! I used a stretchy cotton fabric, which made it easy to create a snug fit on the journal. I embroidered them using my mom's Janome embroidery machine, which took quite a while! Once we got the design figured it out, it took about 15 minutes to embroider each one (15 minutes X 20 journal covers = 5 hours!). I used a different color embroidery thread for each one too, and tried to use each person's favorite color. On a different day, I sewed them together. Actually on two different days. I think they turned out really well! (By the way, this picture shows the covers before I sewed them together and put journals in them.)

Now, here are some gratuitous dog pictures! Here is a sleepy Sadie:


And here is another sleepy Sadie on Christmas Eve:


And here is Sadie in her most prissy pose!


Thursday, January 11, 2007

More Handmade Gifts and Holiday Goodies

I realize that the holidays are but a distant memory now, but I still have more gifts and pictures to share. This is a scarf that I made for my cousin, who is living in Paris right now. She is there for six months teaching English, and as far as I know, this is the first time she hasn't been home for Christmas. I sent her a box of goodies, including the scarf. I thought the yarn was such an interesting combination of colors: gray, pink, orange, yellow, and blue.

This is a purse that I made for my sister-in-law. I used a linen fabric that I bought at Ikea for the outside, and cute frog fabric that I got on Superbuzzy. It is a linen/cotton mix of a similar color, with green frogs and brown numbers printed all over it.


Can you see the little frogs?


Finally, here is another
grocery bag dispenser that I made for my mother-in-law. (The free pattern is here, written by the Crochet Dude.) It ended up being quite a bit fatter than the other one I made--I think I added lots of extra stitches when I wasn't paying enough attention! I think this is a good thing though, because she will have more room for grocery bags.


Right after Christmas, I made the Bisquick Applesauce Muffins recipe shared by Alicia from Posie Gets Cozy. I have to say, they were absolutely delicious! You dip the tops of the muffins
in butter and cinnamon sugar once they get out of the oven--mmmm! Mike and I kept dipping them as we ate them too!


I'll leave you with a picture of the Christmas tree at my mom's house--it was just beautiful!!


Tuesday, October 31, 2006

Happy Halloween!

Here is a picture of the costumes that I made for me and Mike. I am the Greek goddess Artemis, and Mike is a Jedi Knight! I used McCall's pattern M3514 for mine, and Simplicity's pattern 5840 for his. My Granny and I worked on them for 6 hours straight to finish them the weekend before my birthday. Thanks Granny--I couldn't have done it without you!


Speaking of my birthday, here is a picture of the fabulous poached pear tarts that my brother-in-law made for me! He also made a large one, but I think these small ones are too cute.


Trick or Treat!!

Wednesday, September 27, 2006

Travel Bag on Superbuzzy!


My travel bag is officially on Superbuzzy! Check it out here!

I know these aren't craft related, but I thought I would share some of my pictures from Costa Rica. Mike and I went there for our honeymoon in May, and had an amazing time. I would highly recommend traveling there! We stayed on the Pacific Coast side of the country. Here is a lovely view of the Golfo de Papagayo from our hotel lobby:


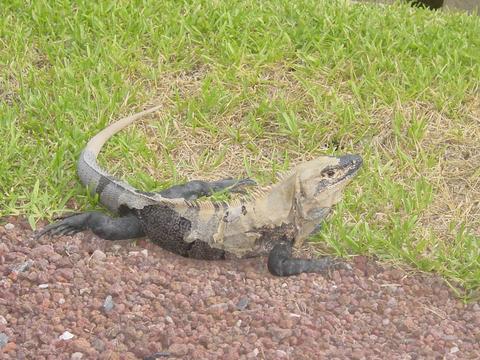
This is a picture of the large iguana that was sunning itself just outside our room every morning. I affectionately named him Iggy. There are tons of iguanas in Costa Rica--we saw about 10 of them just walking to breakfast each morning. The morning was the best time to spot them. As the days warmed up, they would hide out in the shade.


Here is a picture of the sunset on the second night of our trip. We took a sunset cruise in the gulf, which was organized by our hotel. We saw lots of dolphins on this trip, and even saw a blowfish floating on top of the water. Enjoy!

Tuesday, September 26, 2006

Bon Voyage Travel Bag

Here is my newest bag! I made this on Saturday morning with some fabric from Superbuzzy, which I just can't seem to get enough of. The fabric is a cotton/linen mix (I think), and has a nice slight stretchiness to it. It has these cute little swirly figures printed on it in red, with an aqua airplane every so often.


So I used a sturdy aqua cotton fabric for the lining, and accented the bag with red pockets on the inside and outside. I think the red and aqua color combination is fun, and sort of unusual. I used red thread for the top-stitching and on the handles, to really bring out the contrast.


Superbuzzy is going to post a picture of this bag on their gallery page! The owners Kelly and Mariko are collecting pictures of items made with their fabrics and displaying them on their website. My Bon Voyage Travel Bag should be up soon--how exciting!! By the way, if you are in the market for some cute Japanese fabric and other sewing accessories, please check them out. They have a great independent business, and have been very kind to all of their customers. I can't wait until my next order gets here!


Bon Voyage!

Friday, September 22, 2006

Tropical Print Purse

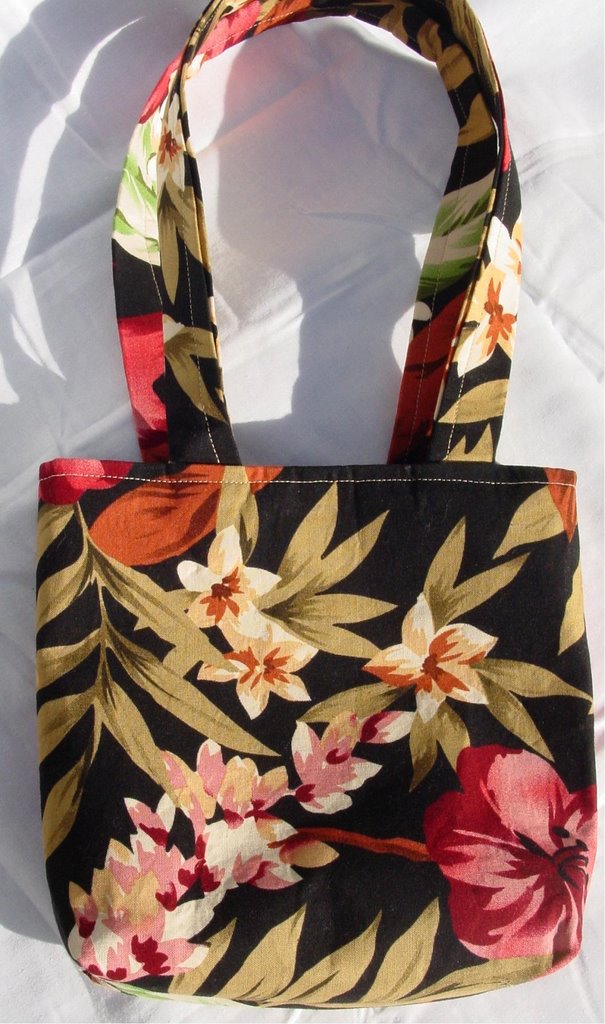
I made this purse a few weeks ago, and enjoyed photographing it outside! I think it looks quite cute nestled up against this tree.

Here is a close-up view of the other side of the purse:


My bonus picture for this post is of the sunset last weekend. We went to the Addison Oktoberfest just north of Dallas. You can see some of the tents and attractions in the bottom of this picture, along with a lone balloon floating among the clouds. This sunset was just beautiful--even more so in person. Enjoy!

Monday, September 18, 2006

Christmas 2005 Handmade Presents

Isn't it irritating that stores feel the need to stock their holiday merchandise as soon as Labor Day is over? The holiday season keeps coming earlier each year! Does anyone really have the overwhelming desire to buy tree ornaments or gift wrap in September?! Halloween hasn't even happened yet people!

Well, regardless of how I feel about that, it gets me thinking about what I'm going to make for everyone this year. Here is a picture of the scarves that I made for everyone last year. I made 7 scarves total, for my sister, my stepmom, my sister-in-law, my cousin my brother-in-law, my father-in-law, and my brother-in-law (Those are in order from left to right).

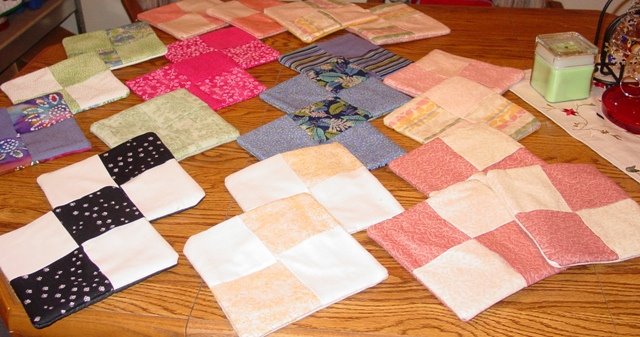
I also made potholder sets for just about everyone I know! I sewed about 45 potholders in all! My friend Monica was a wonderful assistant, as she cut the squares for at least half of these. She was in a mode, and wanted to express herself with a rotary cutter. I think cutting perfect squares appeals to her perfectionist nature! It was fine with me--her help allowed me to make enough for all of my family and my good friends. I now have a distinct groove in my cutting mat at 8 1/2 inches. Here are pictures of the potholders:


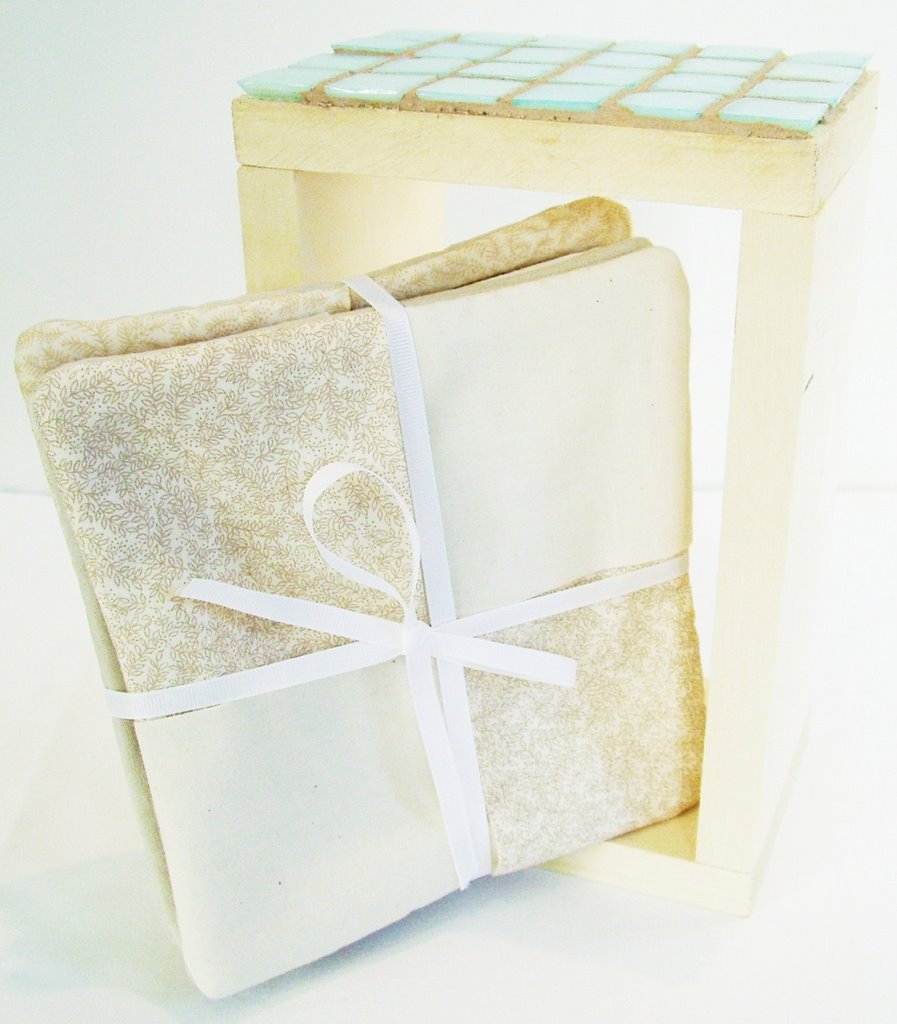
My sister Tracy also requested some more potholders recently, so here is a picture of the set of four I made for her. She likes neutral colors, so I used cream and linen colored fabrics with very soft prints. I took this picture in my photography class at Make, by the way!

Tuesday, August 15, 2006


Happy Birthday Monica!

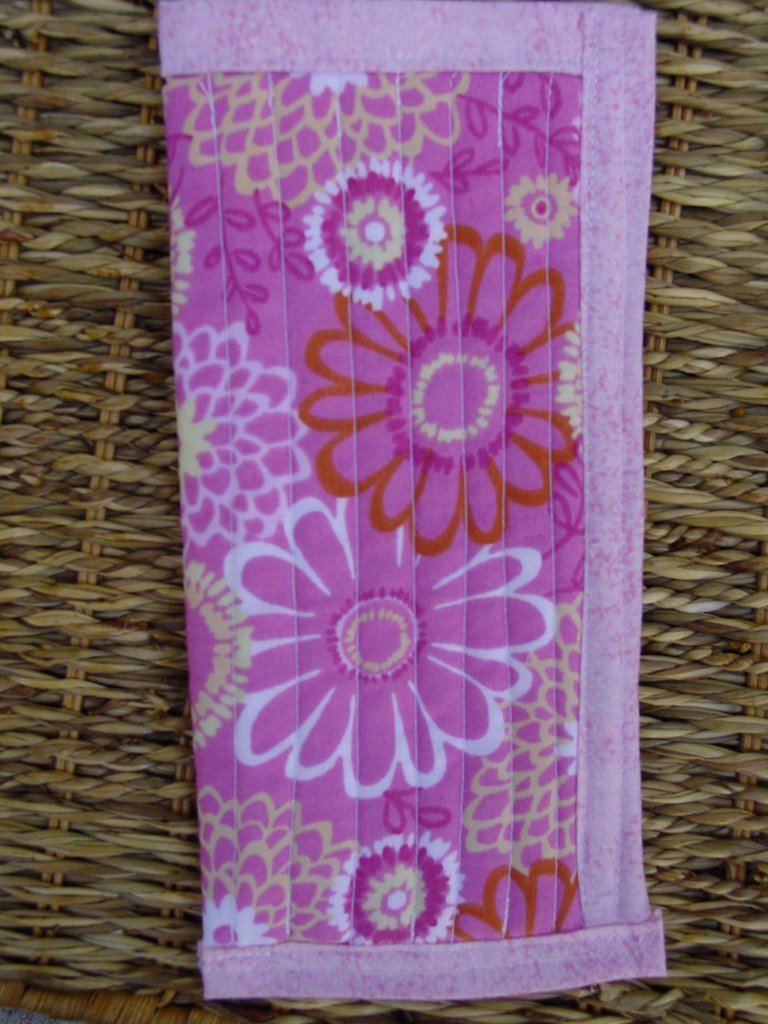
My friend Monica is celebrating her birthday today! I made her this lovely sunglasses case that I think she will enjoy! I found a quick tutorial on the Craftster forums here . I hope she likes it! (I also hope she doesn't check my blog in the next hour before I give it to her!!) Best wishes to Monica for another wonderful year!

Monday, August 14, 2006

Little Pink Purse


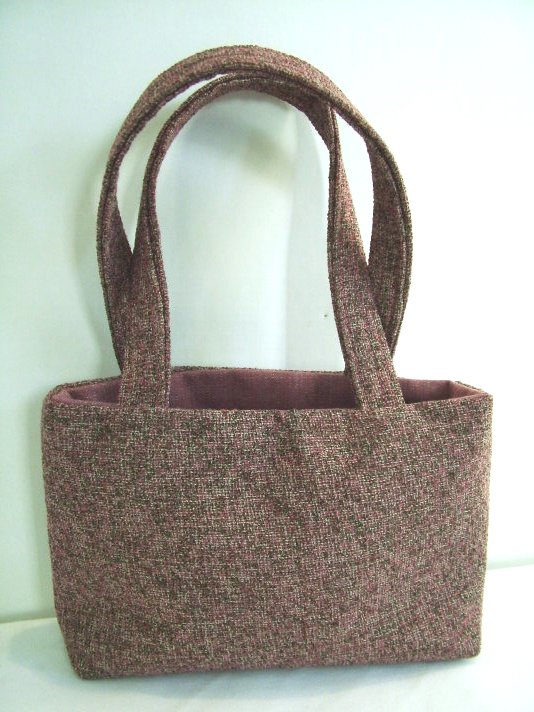
Here is a little pink purse that I made last month. It is about 5.5" tall and about 8" wide. The outside fabric is a pink and brown tweed, and the inside is a pink denim. I also put a teeny-tiny pocket on the inside with the tweed fabric!


I took these great pictures of my little pink purse at the Product Photography Class at Make in Dallas
This class went over the basics of taking more professional-looking pictures of your products if you are selling them, as well as how to edit pictures using photo editing software. The class went over lighting techniques, and even showed me how to use features on my own digital camera! I finally found out what that button with the tulip icon is for! (It allows you to put your camera lens extremely close to your item and still focus.)

At this class, I also met a great DIY-er here is Dallas who makes beautiful jewelry. Check out her website!

Tuesday, August 01, 2006

Scottie Dog

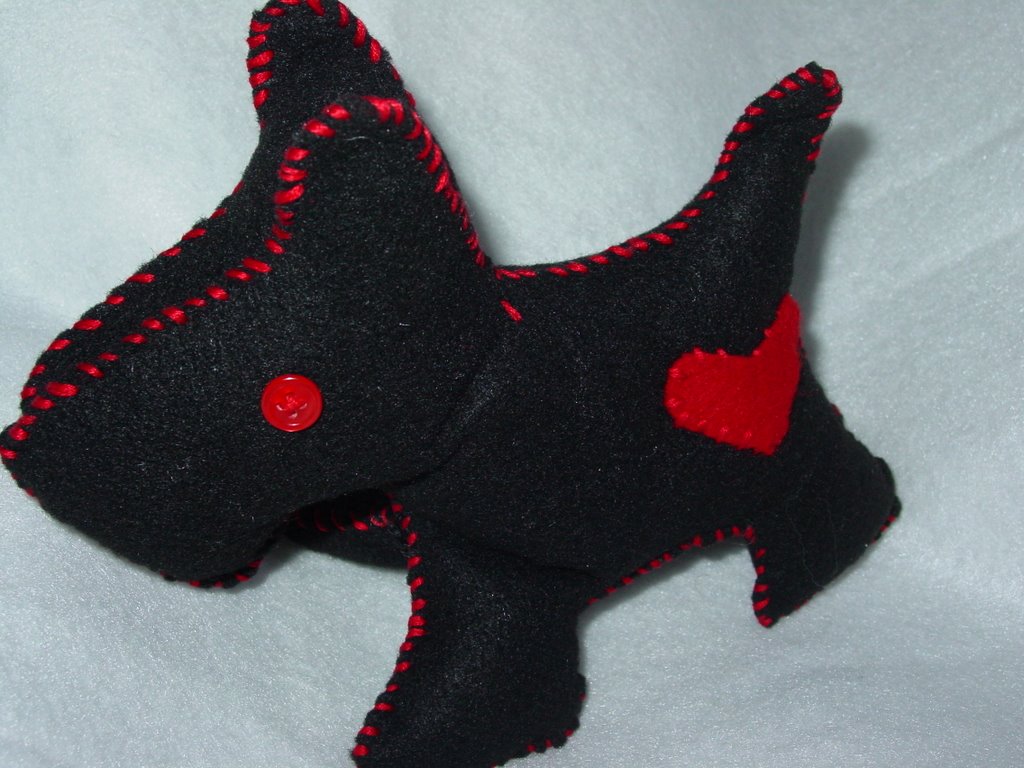
My first plushie! I got this pattern from Jenny at the Allsorts Blog (click here for the pattern and pictures of her scotties).


This is my first real attempt at a stuffed animal, and I am very happy with it. I used felt, two small red buttons, and red embroidery thread. The heart on the scotty bum was my own original creation. All of the sewing was done by hand! My technique could use a little improvement, but I think it's not bad for the first time. The pattern was very easy to use too. If you are interested, check out the Allsorts Blog--she has tons of cute crafts there.

Enjoy!